NetApp Simulator Setup #2
This is a continuation of my NetApp Simulator Setup post, so I assume you have two NetApp simulators running of which one is your primary where you have an iSCSI and NFS volume which is usable for your ESX.
The secondary NetApp has an empty SVM running so far.
Again every description here is referring to the classic version of the ONTAP System Manager.
Configure Cluster & SVM Peering
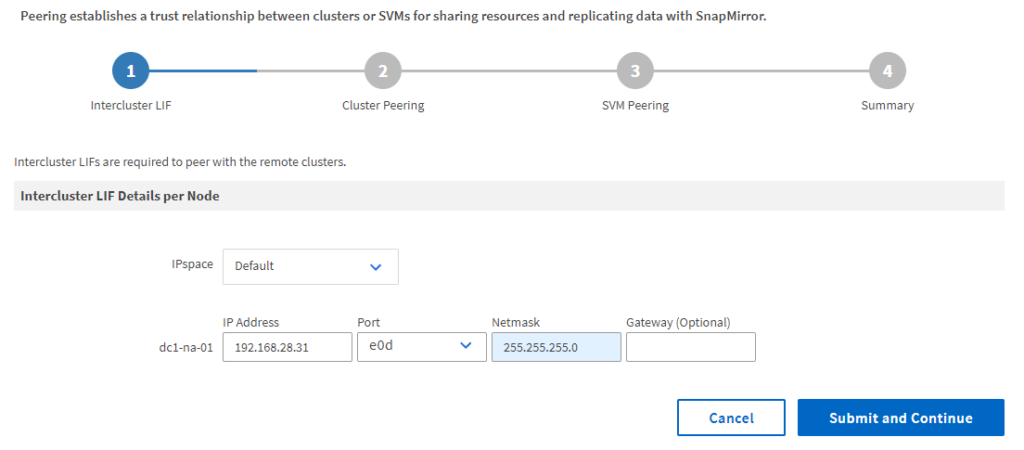
Go to Configuration > Cluster Peers and add a new one. You’ll be asked to enter an IP address for the intercluster LIF. That’s where I use my cluster-to-cluster network on e0d.
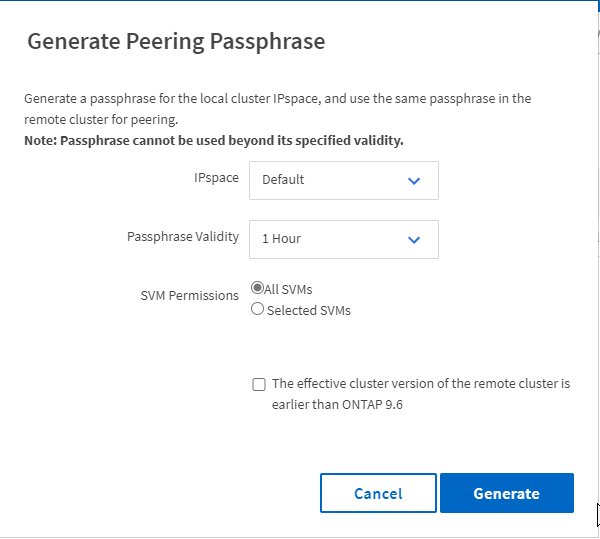
Run the same procedure on the secondary cluster (in a new tab – leave the wizard of the first NetApp open), but cancel the wizard after you set the IP address. When you did this, you’ll be back on the Cluster Peers page and can click on Generate Peering Passphrase in the upper right. Change SVM Permissions to All SVMs and generate the key. Copy it to your clipboard and go back to the wizard on the primary simulator.
Enter the Intercluster LIF IP address of the second cluster and paste the passphrase from the clipboard to the field at the bottom before clicking Initiate Cluster Peering.
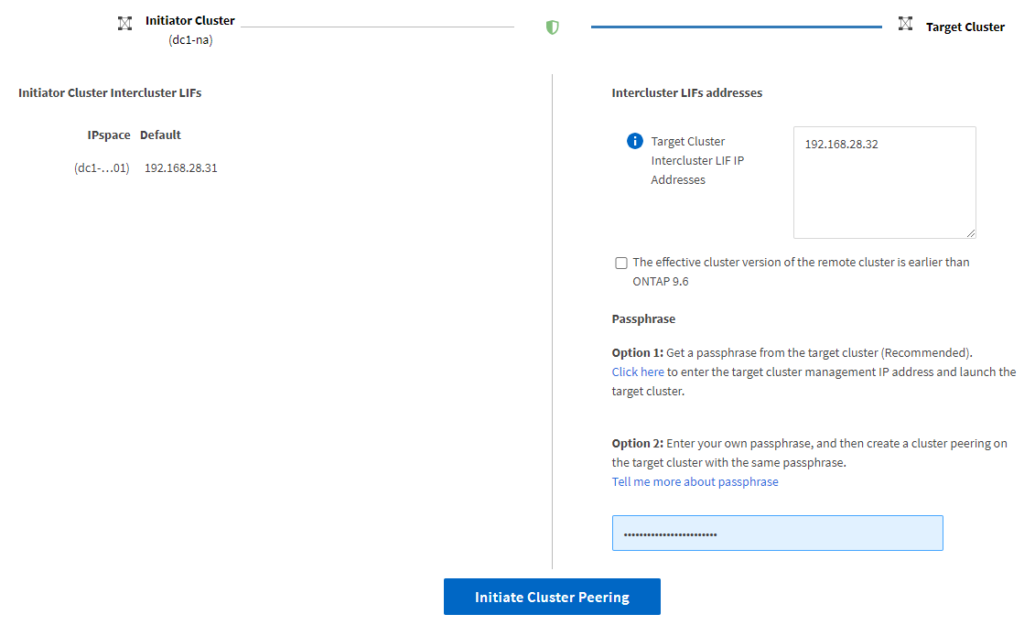
When the peering was successful (if not: check if you have the e0d network adapter 4 on the same port group in vSphere), continue to SVM peering.
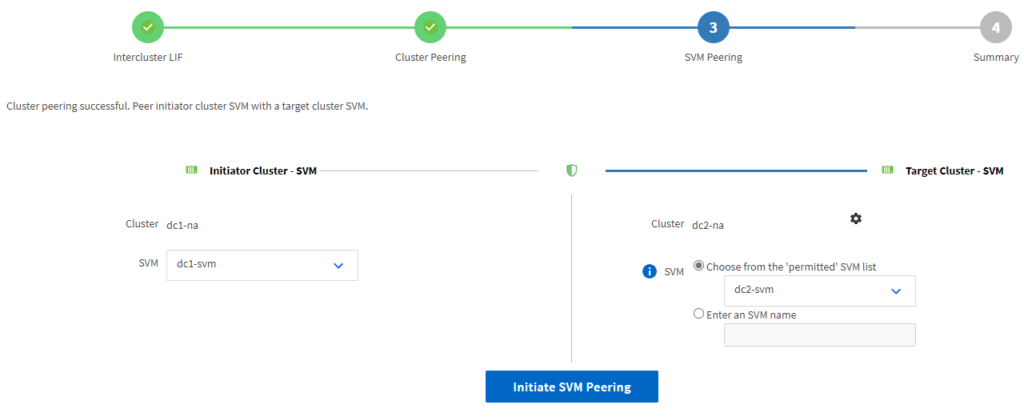
As you have one SVM configured on each side on the next page all the defaults are fine already and you just have to click on Initiate SVM Peering:
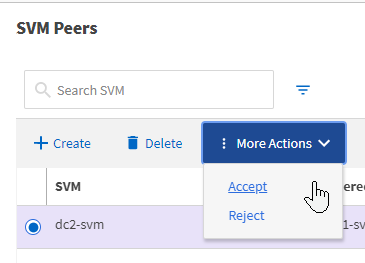
You’ll get a message that you have to accept the SVM peering accept on the secondary site. So go back to the System Manager of your secondary NetApp and navigate to Configuration > SVM Peers to accept the peering beneath the More Actions button:
Click Validate Peering on the primary NetApp and finish the wizard.
Configure Volume Protection
Now I want to protect the iSCSI and NFS volumes I created previously on the primary NetApp. To configure this open the System Manager on the target side (secondary NetApp) and navigate to Protection > Volume Relationships.
IMPORTANT: Initially I added already some virtual machines on my datastore before configuring the volume relationship – that one reproducable crashed my secondary NetApp simulator. I was totally fine with creating these relationships on empty volumes and add data later. So start off with empty volumes here!
Create a new one and select your secondary SVM as target. I want to have an Asynchronous Mirror And Vault relationship, so I leave it. I am fine with the name suffix _dest and I disable the schedule, because I will use Veeam to trigger the SnapMirror / SnapVault synchronization.
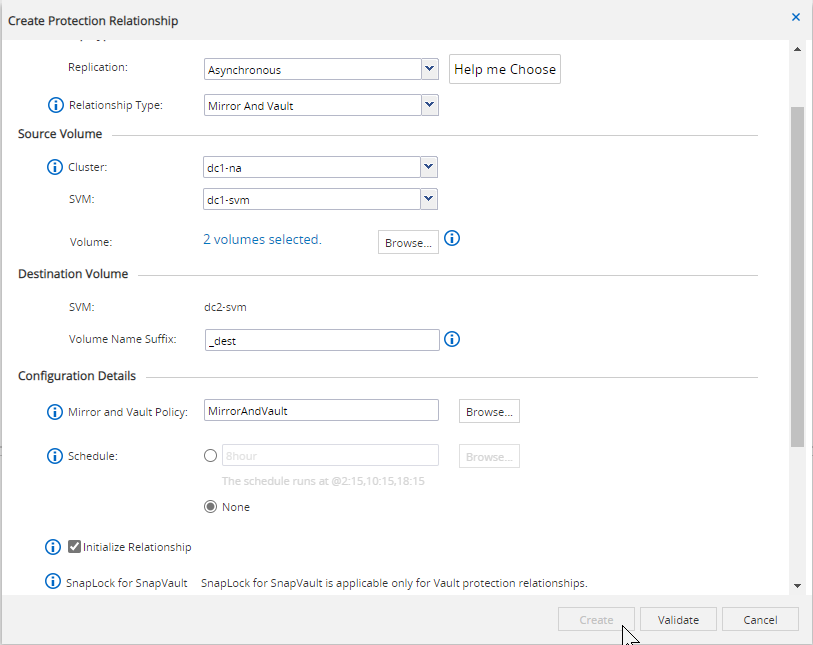
After clicking on Validate I specify to protect all the volumes I selected instead of only those with matching labels before I click Create.

Finishing off the wizard will initate the peering and clicking after some seconds on refresh should show both volumes healthy and snapmirrored.

You can also check the volume status on the primary ONTAP System Manager and will see them in the protected state:

I recommend to shut down both simulators now and take a snapshot or backup (or both) of them, so you can always return back to that working condition.
After that, power them on again and start adding data to the vSphere datastores. I’ll add another article on how to configure Veeam to take Backup from Storage Snapshots, Snapshot-only jobs and so on.