Homelab Revamp 2022 – Part 5 – Node #3
My VSAN stretched cluster (2-node) has been running for some time and in general I am very happy with it, so I decided to invest some more money and expand it to a proper 3 node cluster.
Read more about the story so far in the previous posts:
- Homelab Revamp 2022 – Part 1 – Starting point
- Homelab Revamp 2022 – Part 2 – The Plan
- Homelab Revamp 2022 – Part 3 – The BOM
- Homelab Revamp 2022 – Part 4 – Build, Configure, Learn
My main reasons for the extension are the following
- The power consumption of my witness host is very close to a full blown host, while it is not at all adding resources to the cluster.
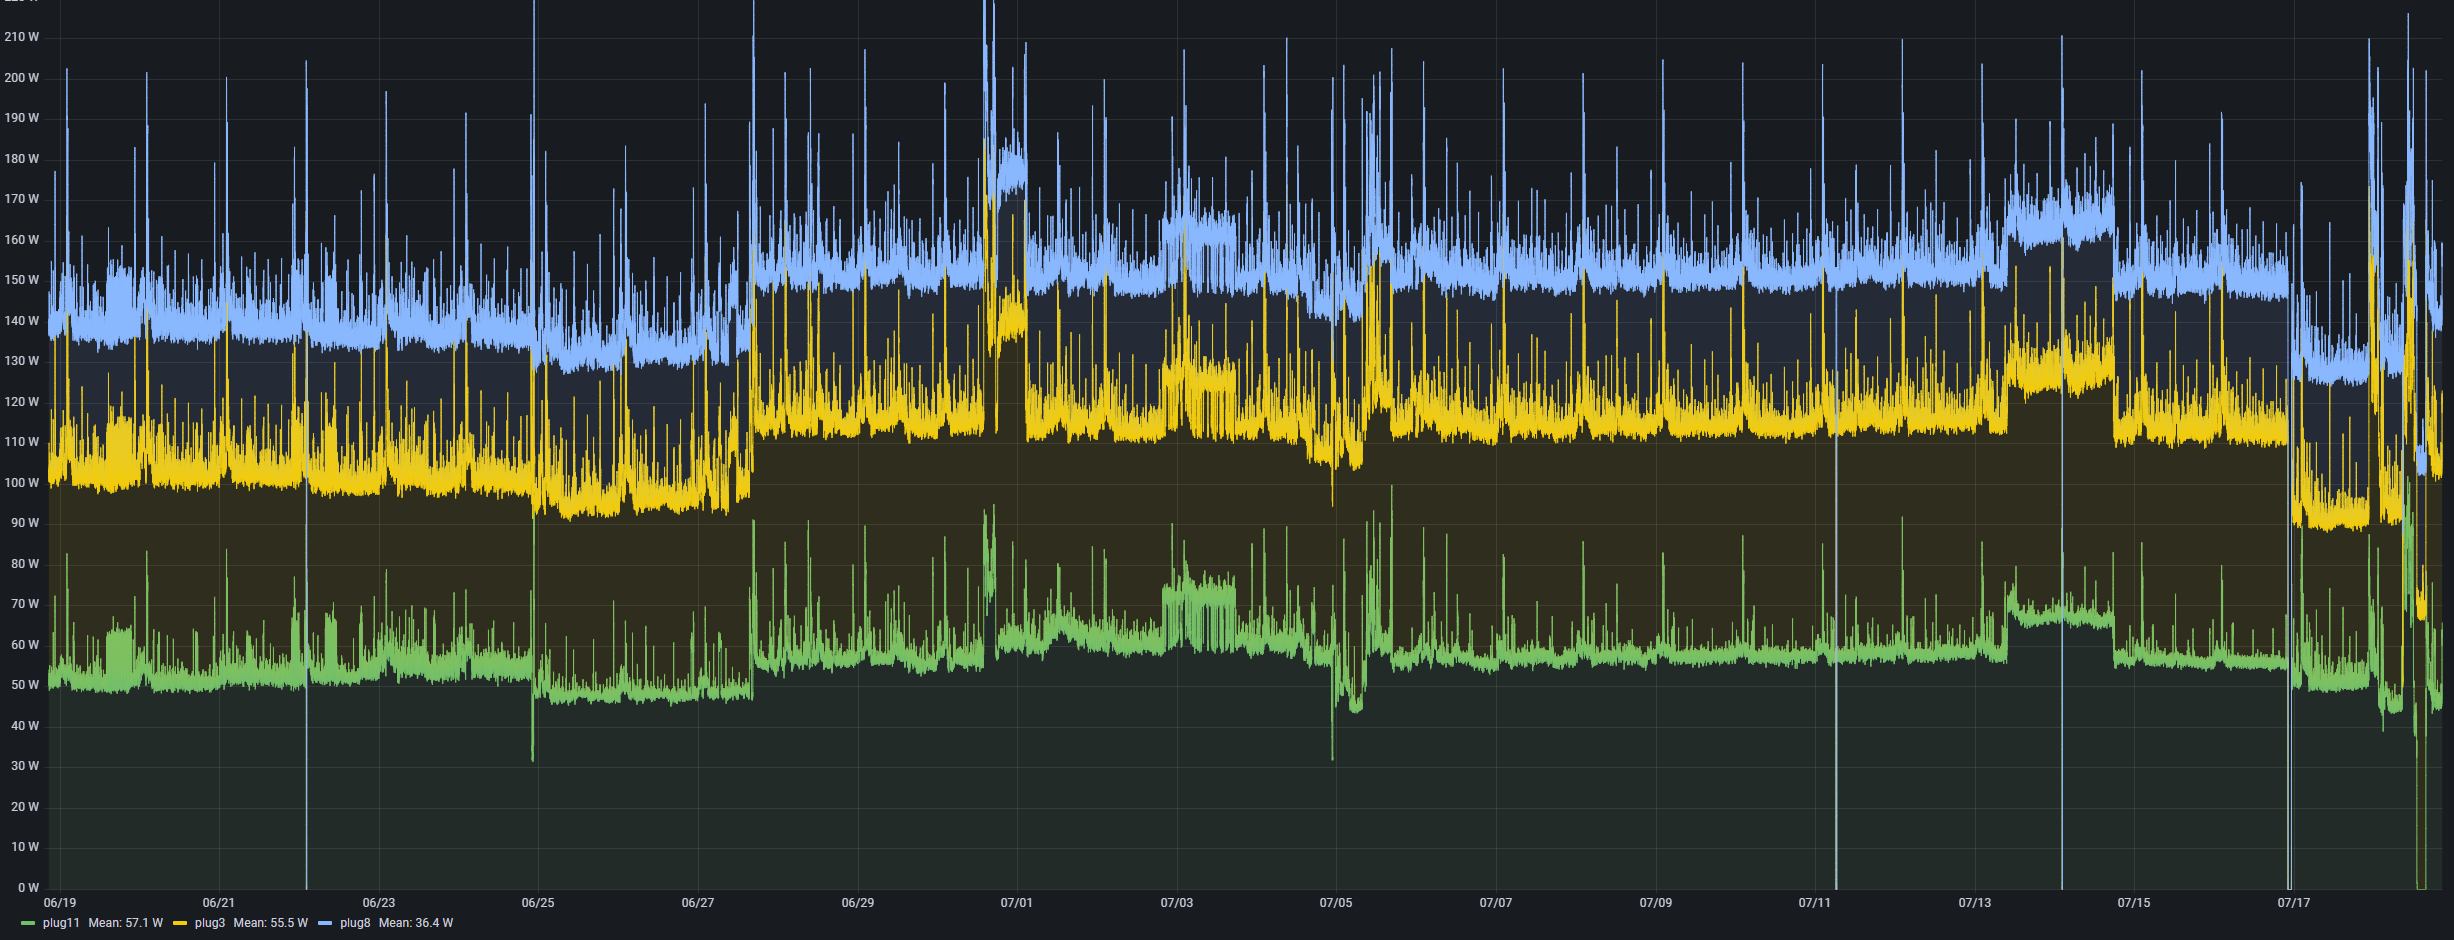
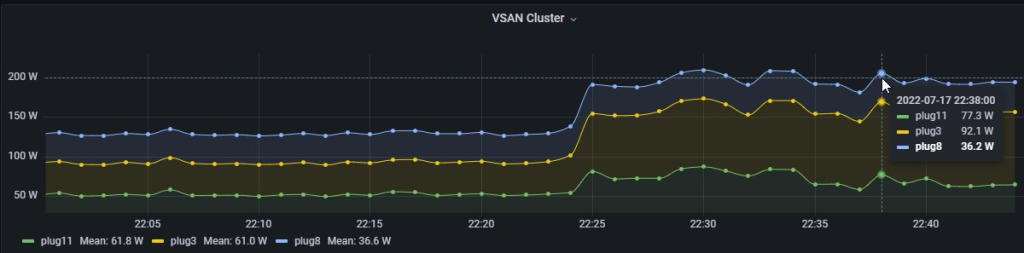
In a 30d overview you can see that the withness consumes 36W while a full blown node consumes ~56W – yes, that’s 20W difference or about a third, but overall not that much for the resources I get.
- I am short on memory when I run lots of workloads. I am currently selecting the workloads I need which works okay, but it will be more convenient with having another 128GB of memory.
- I thought that I can use the VSAN data store as an iSCSI target but learned, that this is not possible in a stretched 2-node cluster setup, so building the normal 3-node will enable me to do so.
The BOM
I changed my initial bill of materials at quite some points.
For the CPU I’ve chosen to go with an AMD Ryzen 5700X instead of the previous 5700G. Both are 8C/16T, 65W and Zen 3 architecture. While the 5700G has integrated graphics, the 5700X has PCIe 4.0 and ECC support (which I am not using). The CPU performance of the 5700X is a little bit higher, though it runs on paper with less GHz (3.4 vs 3.8) base speed. The downside is that I need an external graphics card for the setup and in case of any modification which requires me to go in BIOS or pre-network.
For the mainboard I decided to remove my requirement for a DisplayPort (as the Ryzen 5700X has no graphics anyway) and go for a cheaper option. I stayed with Gigabyte as I had good experiences with the power usage and wanted to use the B550M DS3H. Due to issues (see below) I decided to stay with my initial choice though, even at a higher price.
As I still think that overheating might be the issue of my nodes restarting from time to time, I’ve chosen the be quiet! Pure Rock 2 as a CPU cooler instead of the Arctic Freezer A13 X CO.
| Item | Choice for Node #3 | Price | Difference |
|---|---|---|---|
| CPU | AMD Ryzen 5700X (8C/16T) | 285 EUR | + 15 EUR |
| Mainboard | Gigabyte B550M AORUS Pro-P | 127 EUR | + 14 EUR |
| Memory | 4x 32GB DDR4-3200 any vendor (mushkin in my case à 100 EUR) | 400 EUR | – 40 EUR |
| Cache NVMe | Gigabyte AORUS Gen4 SSD 1TB (1.8 PB TBW!) | 110 EUR | – 20 EUR |
| Case | Sharkoon VS4-V | 45 EUR | + 3 EUR |
| PSU | be quiet! Pure Power 11 400W | 53 EUR | + 11 EUR |
| Cooler | be quiet! Pure Rock 2 | 34 EUR | + 15 EUR |
| Sum | 1,054 EUR | -4 EUR |
Overall the cost stayed the same as some components decreased a little in price over time compensating my more expensive choices. As before I am reusing my Samsung Evo 870 4TB SATA SSDs for capacity tier. I have 3 of these in every node and will move one disk each to the third one.
For the boot drive I do have an unused 250GB NVMe which I will place in the PCIe 3.0 x2 slot on the board, I am adding another system fan on the rear of the chassis (5 EUR) and reuse my present HPE 560SFP+ 10G nic for networking.
The build
I recognized two things when building the system:
- When building with the DS3H I couldn’t connect the front-USB port because of my 10G NIC being in the way. I didn’t really have an issue with that, so I decided to ignore it instead of changing the board. If I’d ever re-use the board for another purpose it is most likely without the 10G NIC, so I won’t have this issue. Also I might be able to force the plug in or use an angle adapter in case.
- The second thing I noticed was also about the board, however. When shutting down the system via the ESXi I recognized the system is just rebooting instead of powering down. It powers down from a live Linux OS so I don’t think this is a hardware issue, but still it is not the right choice for me in this case. If I shut down my system remotely it should stay off and not power on again.
The second point was in the end the reason why I’ve chosen to go with my intial mainboard choice and stayed with the Gigabyte B550M AORUS Pro-P even though it is about 50 EUR more expensive at the time of buying.
Removing disk from VSAN disk groups
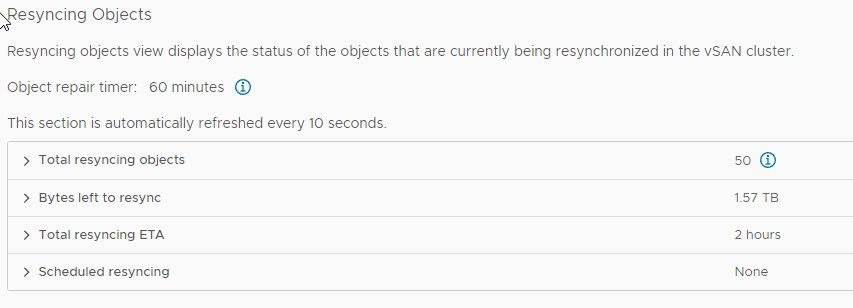
To build my third node I needed to remove one disk from each present node. This process is quite straightforward from the vCenter UI but can take some time. In my case the disks were both filled with around 1.5TB of data and it took each time above 2h to free the disk.

Summary
I recognized the article is already quite long. I’ll write about migrating from a 2-node stretched cluster to a 3-node cluster in another article.